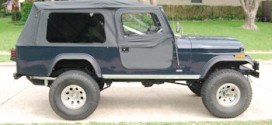
 About 15 years ago, well before this web site was even a thought, I made a several hundred dollar purchase. Of course it wasn’t my only multi-C-Note purchase, and my wife is quick to point that out. It was however, a Kayline Soft Top that would work with my original hard doors on my ’74 TLC FJ40. I didn’t get the soft doors at the time because, well… I just couldn’t afford it at the time (Not much has changed isince then either).
The 4 year old soft top has performed admirably as it has lasted through 4 brutal, sun-baking Tucson summers and even a few snow storms up in the Santa Catalina Mountains in Tucson, AZ.
Last year, while at the SEMA show in Las Vegas, we had the pleasure of meeting lots of folks that we’ve been doing business with and Kayline Manufacturing was no exception. We got to see one of there newer products… Their new line of two-piece doors for Jeeps and FJ’s. They incorporate a patent pending door latch that takes just a few fingers to open and it even latches securely. The doors are made of high grade vinyl, durable ABS plastic and non-fading, crack resistant window material. We couldn’t wait to shed the extra weight that the rattley old, non-sealing hard doors bore. Although still somewhat operative, the original doors on my Cruiser had seen better days even after their rebuilds. Heck, I was looking at nearly 300 smackers for new window regulators anyhow.
Join us as we walk you though the process of building and installing a set of Kayline Manufacturing 2-piece soft doors on our FJ40.
Installation
 Building the set of Kayline 1/2 doors was a piece of cake. A bit time consuming, but nonetheless, it was easy and fun. Heck, I had nothing better to do that beautiful Saturday afternoon. Once you receive your doors, always check to make sure that everything is there. Our shipment came with a complete set, instructions and a list of everything that was to be included. To start, you’ll need an assortment of wrenches, an electric drill, 3/8-drill bit, #2 Phillips screwdriver and a utility knife.
 Step 1: Installing the door hinges
NOTE: You’ll also need a set of original Land Cruiser door hinges, so if you don’t have a set, you won’t be able to install your doors.
You’ll want to start by making some small holes in the vinyl of the soft doors. Don’t let the cutting of the vinyl bother you as you have a whole lot more of it coming up soon. Once you make the holes, position your hinges and install the proper bolts nuts and lock washers. (See photo #1) When you install the bottom hinge, you’ll want to add the door-retaining strap at this time. You will only want to snug them up as it will take some doing to get everything to line up when it’s time to put them on the rig.
 Step 1: Installing the handle assembly
Break out the old utility knife again as you have some more cutting to do shortly. You’ll want to start by attaching the interior handle (door release) retainer. (Note photo # 2) Your third hand comes in handy here as you’ll have to use your first hand to place two small bolts in between the vinyl and the metal bracing and into the two holes. Now, using your second hand, place the retainer onto the two bolts and balance it in place. Lastly, and using your third hand, apply the nuts to fasten the retainer in place. (If you’re like me, you’ll use your fourth hand to set up the proper lighting and your fifth hand to snap the photo.) The retainer keeps the handle from moving too far and damaging the unit.
Next you will want to cut an “X” into the vinyl from corner to corner, in the opening of the metal, as shown in the photograph #2 here. You will also have to make 4 small holes in the fabric to allow for the 4 screws that will hold the cup in place. Once this is done, you’ll need to slide the handle cup into the “X” opening and secure it with the appropriate fasteners.
 Step 1: Handle components assembly
We didn’t photograph this section because there are about ten steps involved. However, you’ll start this process by installing the slide-handle coupler (a supplied small piece of square tubing) into the exterior door handle. You’ll then slide it through the cup opening and into the exterior handle and fasten it with the nut and washer. We decided to add just a touch of moly lube between the interior handle and the inside portion of the cup. This allowed the handle to move a bit easier and will hopefully prevent wearing later.  Once this is done, you’ll want to install the handle return spring, the interior handle cover and the exterior handle cap.
Step 4: Door striker
You’ll start by removing the original door striker. Once this is done, place the appropriate bolt through the door striker bracket and place the bracket/bolt assembly in place on the vehicle. Run two bolts through the bracket and into the original door striker retaining nuts. Just snug them up loosely for right now. Next you will want to slide the striker bushing onto the bolt that you installed through the bracket and secure it with the supplied nut and washer. Again, leave this only snug for now.
 Step 5: Door retainer bracket
This is the last step before fitting the doors. Here you will need your drill, drill bit, #2 Phillips screwdriver and a second person. Place the doors onto the rig and insert the door hinge pins so that the door will open and close, and stay in place. Next, having one person inside and one outside. Close the door almost all of the way and place the retaining bracket onto the interior and rear-facing portion of the door jam. Using a pencil or a scribe, mark the locations of the area where you will need to drill. Drill the holes and screw in the door-retainer brackets. Slide the door-retainer strap on and you won’t have to worry about your doors flying open on a slope or windy day.
Step 6: Door fitting
As with all soft doors, this is probably the toughest and longest part of the job. Two people is handy here but it can be done with one person. We started by shutting the door and aligning the hinges and striker so that things lined up a bit better. Snug down the bolts so that they can be repositioned but won’t move by opening and closing the door. Next, you’ll have to start bending and shaping the metal rods of the door so that they don’t rub on the windshield frame. Additionally, we bent the bottoms of our doors in some so that it created a better seal. This process will take some experimenting, so do yourself a favor and make small adjustments. Keep working at it so that the door will shut and latch and so that it fits well and doesn’t interfere with the window frame.
That’s it! Now you can enjoy the summer days by pulling off the top of the doors or going doorless altogether. With the two-piece doors, we can stack ours up in the back of the rig just in case we find some rain or a mud hole to play in!
Note: Kayline Manufacturing Company is no longer a viable entity.
 4x4Review Off Road Magazine


